Down to the Studs: A How-To Guide on Interior Demolition
Posted in Angelcityfurniture

If your home remodel goes beyond new flooring and a fresh coat of paint, you’ve come to the right place. In this DIY guide, we’ll teach you how to gut a house without breaking your budget or hurting your home’s value.
What is a Studs-Out Remodel?
Gutting a house “to the studs” means taking it down to its original floor plan. Drywall, insulation and ceiling fixtures are stripped away, leaving nothing but beams and unfinished flooring. Essentially, you’re demolishing the interior of your home to rebuild it from scratch.
How Much Does It Cost to Gut a House?
Gut renovation costs are relative, and vary from home to home. While pricing depends on your location, house size and material quality, the average homeowner will spend $44,850 on a studs-out remodel. Add contractor prices to the mix, and you’re paying an extra $4,600 to $9,200 .
To lessen the blow of renovation expenses , you may decide to demolish your home’s interior yourself. All you need is a solid set of home remodeling tools, safety gear and a dumpster rental.
“A big benefit to gutting a house yourself is saving money. It’s an area of work that typically stands alone and is therefore a good option for some sweat equity. It also allows a contractor, architect or structural engineer to see exactly what they’re working with, and may reduce the likelihood of cost increases down the line due to unforeseen conditions.”
Antonia Marinucci | The Architetta
How to Gut a House in 5 Steps

1. Make a Plan for Your Gut Renovation
Interior demolition can be messy, technical and dangerous, so it’s important to start this project with a plan. To prep for your studs-out remodel, make sure you have the right tools and equipment for the job.
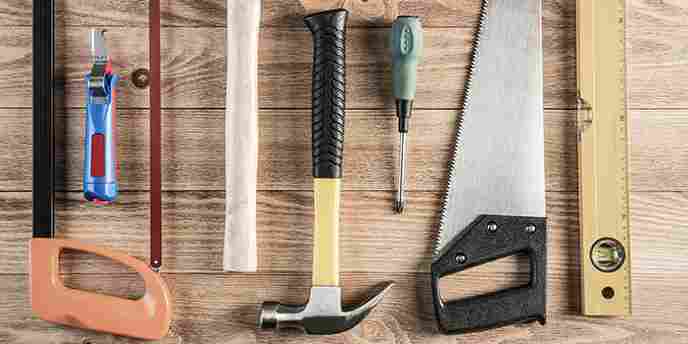
Home Remodeling Tools You’ll Need for a Gut Job:
Once you’ve done a thorough tool box-check, inspect your walls and your home’s foundation. Plumbing lines, pipes and wires all run behind your walls, so know where they are before swinging a sledgehammer. Have a plumber or electrician mark these areas as needed, and save their contact information in case something goes awry during your gut renovation.
Choose where to start remodeling your house, and work from room to room. Have an old bathroom you’ve hated for years? Begin there. We also suggest creating a list of wants and needs for each part of the home, and prioritizing them to stay on budget.
When you have adequate home remodeling tools and a renovation plan , you can start gutting the house.

2. Prep Your Rooms for Demolition
It’s important to prep each room before demolishing it. Gut renovations are particularly messy, so we recommend covering lamps, tables and furniture with plastic. You should also protect your floors with a tarp, unless you plan to install new flooring . Remodeling debris like drywall and dust pile up fast.
And don’t forget about your utility lines. Essential pipes and cables run behind your walls, so shut them off before interior demolition begins. Not only will this protect your home, but it will ensure you don’t get shocked or zapped by a stray wire.
3. Remove Interior Walls
Before removing an interior wall , determine if it’s load-bearing. In other words, make sure the wall isn’t structural or vital to your home’s foundation. If it keeps your home intact (literally), call a professional – you shouldn’t take it down on your own. While the DIY way might be cheaper, it’s not worth ruining a structural wall and damaging your house beyond repair.
“Call a contractor when you think a wall may be load-bearing! You’ll need to make sure the structure is properly supported in your new layout. Always make sure you’re using a licensed professional with appropriate permits for mechanical, electrical and plumbing work.”
Antonia Marinucci | The Architetta
Not sure if your wall holds important utility lines? Make a hole in the drywall and peer inside. If you see pipes and cables, a contractor should take over. But if your wall is clear and wire-free, you can get your home remodeling tools ready.
How to Remove an Interior Wall
With all the dust and debris drywall creates, we recommend wearing a mask and safety goggles for this part of the job. You’re protecting your floors and furniture, so take extra precautions for yourself, too! After you’ve stripped the room bare, you can move on to the next step of your studs-out remodel.
4. Install the Essentials
Now that you’ve removed unwanted walls, you can do more renovating and less gutting. We recommend creating a list of things you want to install in your home, and going from there. Common remodeling tasks homeowners take on after an interior demolition include:
5. Plan Your Cleanup
Studs-out remodels are messy. To prevent waste pileups, clean up as you renovate. While you can move debris into an out-of-the-way pile, having a dumpster rental in your driveway will allow you to clear your work area quicker.
The dumpster you need depends on your home size, debris type and the weight of your materials . When you call Budget Dumpster, we’ll find the right container for your gut renovation. Plus, we’ll spare you countless trips to the landfill and haul the dumpster away when you’re finished cleaning up.
Finish Your Studs-Out Remodel
Once you’ve gutted your house and installed the essentials, put the finishing touches on your home remodel. From bathroom updates to kitchen revamps, we have tips for every room of the house. Check out the following posts to create the living space of your dreams: